Support FAQs

Need help with your account? You’re in the right place. Whether you’re having trouble logging in, updating your profile, or managing your settings, you’ll find answers to the most common account questions here—so you can get back to learning in no time.

What do you need help with today?

Accessing My Documents

Can I upload my own documents to Parchment Digitary Services?

By design, a learner cannot upload their own documents to the platform.

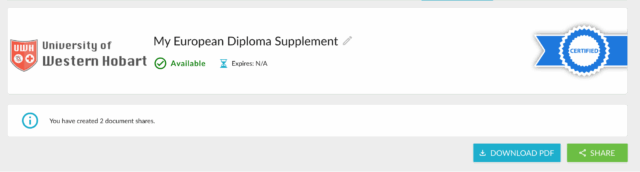
If you would like to have your documents available on the Parchment Digitary Services platform so that you can access and share your document credentials with others, your documents will need to be issued by your Education Provider.

If your institution uses Parchment Digitary Services to issue document credentials to their learners, just reach out to them for help. Your institution will be able to issue a document to you or guide you to access documents that may already be issued to you.

If your Education Provider does not currently issue documents via our platform (client list), then you will need to contact the university/organisation that you are applying to and ask them how else they may accept your documents.

How do I log in with my Education provider account?

Your institution will typically issue documents to a learner’s network login account.

To login to learner’s network login account:

  1. Go to the login page : https://core.digitary.net/#/user/login
  2. Choose to ‘Sign in with your Education Provider’
  3. Click on Institution and start typing to choose your university.
  4. After you choose your institution, If you are having difficulty logging in at this point, or you successfully log in and still cannot see your document, please contact your institution directly as they will be able to help your access from here.

How do I register on Parchment Digitary Services?

If you have received an email notification informing you that you have a document issued from your Institution (remember to check your spam/junk folder, too), this email will contain a link to register on Parchment Digitary Services, where you will be able to access your document(s).

If you have not received an email notification, then you will need to contact your Institution’s Support Team as they will be able to assist you further.

Parchment does not have any control over documents you have ordered nor over which documents are issued to you; the institution alone manages this.

If you have been asked to Register on Parchment Digitary Services with an email address, your link will bring you here. Follow the steps below:

  • Fill in the form with your details.
    • First name
    • Last name
    • Email

Then click NEXT

  • Create your password, then click NEXT. Please note passwords must be at least 14 characters long and must contain at least one digit, one upper and one lower case letter, and one of following characters: ! @ # $ & * ^ . , : ; –
    Any other special characters will not be accepted.

  • After registering, you will need to verify your email address

A verification email will be sent to your email address. The sender will be “relay@digitary.net”. Here you may need to check the other/updates folder or the junk/spam folder.

  • After you enter your verification code, you will then be redirected to your Documents repository page.

How do I reset my password?

Please click the ‘Can’t Sign in?‘ text in the login page, fill in the email address associated with your account, and you will be sent an email with details on how to access your account, including how to reset your password.

Please also remember to check your junk or spam folders.

How do I see the digital signature on my document?

Log in and download your document to your local computer. View it using Adobe Reader version 9 or later.

The blue band visible at the top of your document reveals details of the document issuer.

Click the signature panel, top right, and expand the menu on the left-hand side until you see Signature Details, then Certificate details.

Click on Certificate Details to reveal details of the digital signature on your document.

I am not receiving the verification code to log in

If you are not receiving your verification code email, or your code is expired or invalid when you receive it there are a couple of things you can do:

  • check your spam folder for the email
  • request a new verification code by clicking RESEND

Be sure not to request this too soon; wait a minute or so as the new code will overwrite previous codes requested which may cause confusion.

I didn’t receive an email notification that my document was ready to be picked up

You may be expecting your document to be issued to you shortly.

Please check to see if you received an email notification with instructions on how to create your account. You may need to check your spam/junk folder as well.

The email will contain instructions from your institution for accessing your document(s).

If you still cannot find the email notification, then you will need to contact your institution directly as they will be able to assist you further, including by resending the email.

Be aware that if you did not receive an email notification, your document may not yet be issued to you.

Parchment does not have any control over documents you have ordered nor over which documents are issued to you; this is managed by the institution themselves and they will be able to provide help to you.

I’m still waiting for my document to be issued, what can I do?

Your Education Provider alone can determine when and which documents are issued to you, Parchment has no visibility into the status of your document issue.

If you have not received notification that your document has been issued, you will need to contact your Education Provider directly.

Is Parchment Digitary Services secure?

Parchment Digitary Services documents can only be created by officials of institutions and organisations that have been Parchment-enabled. The process of issuing documents is subject to multi-factor authentication checks.

Once issued by the institution, official documents are protected from tampering and fabrication.

They are made available to learners through a secure online portal, where they can be viewed but not modified in any way. Once accessed by the learner, it is the learner that controls who sees their documents through the use of the Parchment Digitary Services sharing facility.

My document content is not correct, who do I contact?

If your digital document contains any incorrect content such as incorrect grades or a name misspelled, you will need to get in contact directly with the Education Provider that has issued your document.

Institutions are solely responsible for uploading and issuing learner document credentials and will be able modify your documents if required. Parchment cannot amend any documents.

The verification code I receive is always expired

The verification code only lasts a few minutes. And it will expire if a new code is requested.

If your code is expired or invalid when you receive it there are a few things you can do:

  • Try using your phone to access the code more quickly; your pc or mac may have a tool or application that’s causing a delay in receiving emails (which are sent immediately), i.e. access the portal on your computer and the email on your phone during the login process, you can select an alternate email address on the MFA validation screen by choosing “Try another way” and selecting a different email address.
  • Ensure that you don’t
    • close your browser window/tab
    • navigate to another page
    • refresh the page
    • request a new verification code too soon (this will overwrite previous codes requested)

If you use your phone for the entire process, please go to your browser first to sign in:
https://core.digitary.net/r/user/login

Then, when you are sent a verification code you can check your email in a separate tab or via your email app.

If you open the portal via your email app, this opens a temporary browser window which can close when returning to your email to check the verification code.

What do I do if my education provider account has expired or I can no longer access my email?

You will need to contact your education provider directly for help.

In most cases your education provider will be able to change the initial login method required for you to access your documents.

This will allow you to access your document with your preferred email.

Once this is done, you will receive an email with a link. Follow the link and online instructions to access your document.

Who do I contact if I cannot log in with my education provider’s single sign on account?

If you are having difficulty signing in with your education provider’s single sign on credentials, please contact your education provider directly who will give you full details of how you will need to register and log in to your account.

Why can’t I see my documents?

If you log in and cannot see your documents, you may not have registered and logged in to your Parchment Digitary Services account using the method set by your education provider.

Your documents can be issued to either your university/institution login account or to an email address. Each of these will require a different login method.

How do you know which method to use?

When your document is issued to you, you will receive an email notification with instructions on exactly how to register and log in to your Parchment Digitary Services account to view your document (also check your spam/junk folder for this email). Follow the link which will bring you to the correct page and follow online instructions.

If you are in any doubt about the login method required, or have not received an email notification, please contact your education provider.

Please Note: If you do not use the correct login method, you may not be able to see your document. Additionally, if you have not received an email, your document may not yet have been issued to you and you will need to contact your Education Provider directly for further assistance.

Why is the digital signature showing as “At least one signature has problems” in Adobe Reader?

When you download a signed document and view in Adobe Reader you may come across this warning message.

Although this error appears in Adobe Reader, all signatures are valid and legally binding.

This error is likely to do with your copy of Adobe Reader’s local certificate trust store: a list of trusted certificates that the Adobe program uses to validate the signature on a signed PDF document.

To update your local certificate trust store in Adobe and Resolve the issue:

  1. Open the PDF document in Adobe Reader showing the “At least one signature has problems” error.
  2. Click on the Signature Panel button, which will be on the right of the error.
  3. Click on the Validate all link. It will prompt the message to validate all signatures depending on the settings.
  4. Click OK to validate all the signatures. Once all signatures are validated it will show a success message depending on the settings.
  5. If the signatures are successfully validated Adobe Reader will show the message Signed and all signatures are valid. If that is the case, you can skip the next steps.
  6. If the At least one signature has problems error is still visible, select the signature which has the problem and right click on it. It will display a pull-down menu. Here, select Show Signature Properties in the menu and the Signature Properties window is shown.
  7. Click on the Show Certificate button, and a Certificate Viewer window will open from where you can see the details of the certificate.
  8. From the Certificate Viewer window, click on the Trust tab, and you can now see the Trust settings. Here, you will see the This Certificate is not trusted message.
  9. Mark the certification path, click the Trust tab and then Add to Trusted Certificates. Toggle Use this certificate as a trusted root
  10. Answer OK to any security question that follows.
  11. Click Validate Signature to execute the validation. Now the signature is validated and it will display Signature is VALID, signed by message in Signature Properties window which is opened in Step 6.
  12. Click on Close button to close Signature Properties window.

Managing My Account

Can I download and print my document?

Parchment Digitary Services provides a simple way for you to download and print your document.

However,  although you are able to print your document for your own records, the printed copy is neither a verified record of your credentials, nor is it tamper-evident, and therefore the printed copy cannot be accepted as an authentic document.

  1. Log in to Parchment Digitary Services and click on the document that you would like to print. You’ll be brought to the individual document view page.
  2. Click on the Download icon above the document. This will allow you to download and save your document locally to your personal computer, from where you can then print your document.

Does Parchment use cookies?

Our site uses cookies to distinguish you from other users of our site. This helps us to provide you with a good experience when you browse our site and also allows us to improve our site.

A cookie is a small file of letters and numbers that we store on your browser or the hard drive of your computer if you agree. Cookies contain information that is transferred to your computer’s hard drive.

We use the following cookies:

  • Strictly necessary cookies. These are cookies that are required for the operation of our site. They include a cookie that enables you to log into secure areas of our site and a cookie to recognise your choice of language. These are session cookies and will expire on logout of the site or after 15 minutes of inactivity.
  • Performance Cookies. These cookies are used to collect aggregated information on the pages visited on our site which we use to improve the user experience and performance. Performance cookies preferences are selected on first login or from the account setting page in your digital wallet.

You can block the use of cookies on your browser. However, if you use your browser settings to block all cookies you may not be able to access all or parts of our site.

How can I change my primary email account?

To change your primary email, you must first link another email account, see the article:

How do I link another email to my account?

Once you have linked another email to your account, you can change your primary email.

  1. Navigate to the Account Settings page
  2. In the Email accounts section, click the MAKE PRIMARY button next to the email account that you wish to change your primary email to.

    If you wish to remove the old primary email, log out and log back in using the new primary email. Once you are logged in with the new primary email, click the REMOVE button next to the old primary email.

    Note that you cannot remove an email which was used by your issuing organisation to issue documents to you.

How can I combine and merge my two accounts into one?

To consolidate two email accounts into a single account and access all your documents, follow the example below. Please ensure that you have full access to both your email accounts. If you have lost access to any account, you must recover the access before proceeding with the merge.

Olivia has created two separate accounts with two different email addresses, Olivia has documents in both accounts and now would like to merge these accounts so that she can see all his documents in the one place.

You’ll be able to do this from your Account Settings page.

In the below example, Olivia Citizen has logged into her account with the email Olivia.citizen@universityemail.com, she wants to merge another account into this, one that she has previously created with Olivia.digitary@outlook.com.

  1. Log in to Parchment Digitary Services (in this case, Olivia logs in with Olivia.citizen@universityemail.com)
  2. Click the dropdown menu next to your name and go to Account Settings

  3. Under Email accounts, choose +Link Another Email
  4. Add the email address that you would like to link to this account and click Add.
  5. A message will pop up saying that this email is already registered and ask you to enter the password for this account.
  6. A verification code will be send to the email you are trying to merge to.
  7. A message will popup to confirm merging the accounts.
  8. Your newly added email will now show as ‘verified’
  9. In your profile settings, you can also mark this new email as your primary email address by clicking on Make Primary beside the email address.

How do I link my account to my education provider account?

You’ll be able to do this from your Account Settings page.

  1. Log in to Parchment Digitary Services
  2. Click the dropdown menu next to your name and go to Account Settings

  3. Scroll down to Education provider accounts and click Link account
  4. Type your education provider name and click Continue.
  5. This will bring you to your education provider’s login page.
  6. A successful login will redirect you back to your Parchment Digitary Services document wallet.
  7. Press on Link to confirm linking the account.
  8. Navigate to the documents page to see your documents which have been issued to your education provider identity(i.e. to your institution/university login).

Thereafter, you will be able to log in with your newly added education provider’s account.

How do I merge an institution account into my existing account?

You may have created two Parchment Digitary Services accounts, one with an email address and one with your education provider single sign on account. To merge these two accounts into one where you can see all documents issued to you in one place, follow these steps:

Log into your Parchment Digitary Services account via your usual method and go to “Account settings”

Navigate down to “Education provider accounts” and click “LINK ACCOUNT”

Enter in your Institution and click “Continue”

You will then be redirected to your education provider account login page. Once you have logged in, via your education provider account, you will then be redirected back to Parchment Digitary Services. You will be asked if you wish to merge your institution provider account into the account that you are now logged in to.

Choose to merge and follow online instructions.

Thereafter, you will be able to see documents associated with your institution provider account as well as any documents that you saw before the link.

How do I link another email to my account?

You’ll be able to do this from your Account Settings page.

In this example John Citizen has already associated his university email address (john.citizen@universityemail.com) with his account. As this email address may expire at some point in the future, John would like to link to his lifelong personal email address (john.citizen.digitary@gmail.com) to his account.

Here’s how he can do this.

  1. Log in to Parchment Digitary Services
  2. Click the dropdown menu next to your name and go to Account Settings

  3. Under Email accounts, choose +Link Another Email
  4. Add the email address that you would like to link to this account and click Add
  5. At this point, in the Account Settings page, you will be able to see that the new email has not been verified.
  6. You will have received an email notification with a verification code to verify ownership of the new email address.
  7. Copy this code and enter it in your account settings page to verify the email.
  8. You can now log in with either your newly linked email address or the old email address. The same password will work for both email addresses.
  9. Your newly added email will now show as ‘verified’

In your Account settings, you can also mark this new email as your primary email address by clicking on Make Primary beside the email address.

I would like my account information and data deleted

Parchment provides a secure online platform that enables reputable Higher Education Institutions (i.e. Universities, Institutes of Technology, etc.) to issue official documents online. These official documents include transcripts, degree certificates, college grades, etc.

This gives you, as the document owner, the possibility to access your official documents online 24/7 and to share them with others as you see fit.

If you would like us to remove your Parchment Digitary Services account, please contact support@digitary.net to request that we delete your data from our system.

Although we can remove your Parchment Digitary Services account once you have confirmed this is your intention, as a data processor acting on behalf of Higher Education Institutions, (the Data Controllers), Digitary require the permission of the organisation that has issued your document(s) in order to remove your data entirely from our system.

If this is what you intend, you will  therefore need to contact the organisation(s) that have issued your document(s) in order to request this from them. Once they have notified us to give their consent, we will immediately initiate the removal of all data as per your instructions.

Why can’t I remove my primary email?

Your account must have a primary email address linked to your account.

In order to remove an email address from your account, you must first link another email to your account (How do I link another email to my account?)

Once you have linked another email to your account, you can assign the newly linked email as your new primary email and remove the old linked email address (i.e. your previous primary email). To do so, log out and log back in using the new primary email. Once you are logged in with the new primary email, click the REMOVE button next to the old primary email.

If your primary email was used by an institution to issue documents to you, you will not be able to remove the email from your account. This email address may be used by the institution to update your documents.

If you still want to remove the email, you will need to contact the university directly to ask them to re-associate your document with another email address.

Sharing My Account

Can I create an OPEN share where no email or PIN is required to view my document?

The SHARE button will allow you to share your document(s) on the Parchment Digitary Services platform.

Below are the steps to share a document with no email/PIN requirements to view the document.

  1. Browse to the URL https://core.digitary.net/#/user/login and log in with your usual method
  2. A successful login will bring you to the “Documents” page.
  3. Click into the document which you would like to share if you would like to view it first before sharing (otherwise you can click “SHARE” from here and move to step 6).
  4. This will bring you to the “Single Document” page
  5. Click the “SHARE” button on this page( Highlighted below )
  6. Select “Public on the web”, then click the “CONTINUE” button
  7. You can optionally enter in the following fields
  • Share name
  • Purpose of share
  • Expiry date

  1. Once you are happy with the data you have entered, please click “SHARE” .

    This will generate a link from which your document(s) can be viewed.

You can then copy the link and share on a CV, social media page, or in an email as part of a job application.

Anyone in possession of this link will have access to the document you have shared.

Can I edit or disable my document share?

Yes, as a learner you always have full control over access to your documents.

Go to your list of shares in Sharing.

and click on the individual share that you would like to edit.

From here you can disable / re-enable a recipient’s access to your document. You can also copy the URL of your share.

Click edit to:

  • add, remove, or edit a PIN
  • add, remove, or edit an expiry date for your share
  • add a reference for your share
  • personalise the name of your share
  • optionally add a reason for your share

Can I view the activity / history of my share?

Yes, you can. Log in to Parchment Digitary Services and click on the document you are interested in.

The access control tab at the top of the page will detail all the shares that you have created on that document.

The history tab will give you details of all the events connected with your document, including when:

  • the document was issued
  • a share was created
  • the share was viewed by the recipient
  • the share was edited by yourself

How can I tell if my share has been viewed?

There are two places in your account wallet that will give you this information:

Individual Document View

When you log in you will be shown a list of all the documents issued to your account. Click on the document that you would like to view.

In the individual document view, you will find a summary of the number of shares created on that document and the number of views that those shares have had.

Individual Share View

This provides more specific details of each individual document share.

Go to the Sharing tab and click on the share that you would like to view.

In the summary details at the top of the page you will be able to see how many views your share has had.

In View Activity, further down the page, you will be able to see the details and activity associated with your share.

How do I create and share a curated profile?

A Curated Learner Profile will allow you to arrange any of your issued documents and badges into a single shareable academic profile.

You can then securely share your profile with a third party towards any goal, e.g. internship, post-graduate job, summer volunteering post.

Create a Profile

Choose Profiles from the menu tab and then Create.

  1. Name your profile (visible only to you)
  2. Edit your name and profile
  3. Include your pronouns (optional)
  4. Upload a profile picture (optional)
  5. Include a short introduction to your profile (optional)
  6. Click Add Links to add links to your profile (optional)
  7. Click Add Documents and Badges to choose which of your credentials to add to this profile and click Save. You can click into any of the documents to expand the view and see more details.
  8. Choose Preview to view your profile.

Share your Profile

  1. Click “SHARE” and select the type of share, then click continue

A. Email Share

  1. Enter a name for your share (visible only to you)
  2. Enter the purpose of your share (optional)
  3. Enter the recipient email of your share
  4. Include a personalised message for your share (optional)
  5. Toggle whether the recipient can download your document(s) in the share
  6. Set an access PIN for your share (optional)
  7. Set an expiry date for your share (optional)
  8. Click Confirm
  9. A pop-up message will appear to confirm that your share has been created

B. Public Link with PIN

  1. Enter a name for your share (visible only to you)
  2. Enter the purpose of your share (optional)
  3. Include a personalised message for your share (optional)
  4. Set an access PIN for your share (optional)
  5. Set an expiry date for your share (optional)
  6. Click Confirm
  7. A pop-up message will provide you with a link and you can click to Copy the link to your clipboard and paste online or in an email or wherever you choose.

C. Public Link

You may wish to share your profile as part of an online profile page or within a digital document;  you want anyone viewing your profile to be able to click on a link and view your profile.

  1. Enter a name for your share (visible only to you)
  2. Enter the purpose of your share (optional)
  3. Set an expiry date for your share (optional)
  4. Click Confirm.
  5. A pop-up message will provide you with a link and you can click to Copy the link to your clipboard and paste online or in an email or wherever you choose.

How do I share a document with an employer or interested third party by email?

The Document Share wizard will guide you through sharing your documents to an email address.

  1. From the list of documents in your wallet, click the Share button next to the document which you would like to share
    OR click on the document entry itself which will bring you to the Individual Document page and click the Share button from there.
  2. A dialog window will pop up on screen, choose Email.
  3. And fill out the following:
    You will be asked to enter:

    Share name Optional Choose the personal name of their share; this is not visible to the recipient
    Purpose of the share Optional Choose to add the reason for the share to help categorise the share, e.g. internship, job application, etc; again this is not visible to the share recipient
    Recipient email Mandatory Recipient email address. Recipient will need to enter this address to view the document shared with them
    Personal message Optional Choose a personal message to appear with the share
    Reference Optional Add a reference number or text (e.g. of a job application); this will be seen alongside the document when it is viewed by the recipient.
    Acsess PIN Optional A 4-6 digit code. In addition to the email address above, if you choose to include a PIN, your share recipient will be required to enter the PIN in order to access the share. You can choose the PIN or click to have one autogenerated. The PIN will be sent to the recipient automatically in a separate email (whether you have chosen to manually enter your PIN or have it autogenerated).
    Expiry Date Optional Set an expiry date after which, the share will no longer be accessible. If a date is not entered, the share will not expire. The expiry date is visible to the recipient in the notification email.
    Download Document Optional Check this box if you would like to allow your recipient to download your document. (Box is checked by default).
  4. Your share recipient will receive an email notification that you have shared a document with them. The email will contain a link that will redirect them to a page from where they can view your document.
  5. They will be asked to enter their email address and the correct Access PIN (if you have associated a PIN).
  6. They will receive the PIN in a separately autogenerated email.They will be asked to enter their email address and the correct Access PIN (if you have associated a PIN). They will receive the PIN in a separately autogenerated email.
    You have full control over the access to your document at all times and can edit, disable or re-enable your share at any time.

How do I share a document with an organisation on Parchment Digitary Services?

The SHARE button will allow you to share your document(s) with a registered organisation  on the Parchment Digitary Services platform.

Below are the steps to share a document.

  1. Browse to the URL https://core.digitary.net/#/user/login and log in with your usual method
  2. A successful login will bring you to the Documents page.
  3. Click into the document which you would like to share if you would like to view it first before sharing (otherwise you can click SHARE from here and move to step 6).
  4. This will bring you to the “Single Document” page
  5. Click the SHARE button on this page
  6. Select Organisation, then click the CONTINUE button
  7. To share to a trusted organisation on our network,  click the Recipient field and begin to type the name of the organisation that you wish to share your document to.
  8. Enter in the fields required.
  9. Expiry Date is a date which you can set so that your share will no longer be available to the recipient at this date (OPTIONAL).
  10. Once you are happy with the data you have entered, please click SHARE .
  11. The share will automatically be sent to the designated inbox of your recipient organisation and you will see a pop-up confirmation.

The organisation to which you have sent the share will then see the share in their designated inbox on their Parchment Digitary Services portal.

Note: If you do not see the Institution you would like to send your document to on the dropdown list, they may not be registered yet on the Parchment Digitary Services network, check with the institution.

How do I share my documents with WES or another institution or university?

Some universities, professional bodies, credential evaluators, and other organisations use the Parchment network to receive verified documents from applicants.

If you are asked to share your documents using Parchment Digitary Services, it’s easily done:

  1. Log in and click on the Share button next to the document you wish to share.
  2. From the dialog window, choose Organisation.
  3. Start typing the name of the organisation that you would like to share your document with and click to choose that organisation from the dropdown list.
    Choose the institution you wish to share your documents with. If your institution is not on the dropdown list, the institution may not yet have an active mailbox within Parchment Digitary Services.
    (You can still share by email to a member of staff at the institution)
  4. Enter the required fields (mandatory fields are marked with an asterisk).
  5. You can choose to add an expiry date to your share.
  6.  Click Share and from here you will see a notification that your share has been sent.

The organisation to which you have sent the share will then be able to access your document from their designated Parchment Digitary Services inbox.

I can’t see the organisation I want to share my documents with on the dropdown list

If you cannot see the document that you wish to share your documents to on the share dropdown list, that organisation may not have an active mailbox within Parchment Digitary Services where they can receive your network share.

Organisations that receive large volumes of documents from Parchment Digitary Services education providers will be registered and vetted before appearing on the Parchment network and you can expect this list of organisations to grow over time.

If the organisation with which you want to share your documents doesn’t appear on the list, you can create a share of your document to the specific email address of someone within that organisation.

The recipient of my share cannot access my document

There are a few things you can check.

View your share details by going to the Sharing tab and click on the share to view its details.

  1. Ensure that your share is enabled and that it has not expired.
  2. 
Check with your recipient that, if prompted, they are entering the correct email address when trying to access your document, (that to which the notification of the share was sent).
  3. Check whether you have associated a PIN with the share. If so, you may need to communicate this separately to your recipient; they will not be able to view your document without the PIN.
  4. If you have chosen to give your share URL to the recipient by copying and pasting the URL generated by Parchment Digitary Services into an email, please ensure that the URL is copied correctly.

What are all the ways that I can share my documents?

There are four main ways in which you can share documents with third parties, all by generating a unique link to the document. There are a number of options available to you to make the process more secure.

Start from your document repository and click on the Share icon next to the document you’d like to share.

You can Share with:

  • Email – share to a specific email address, optionally add a secure PIN and/or a share expiry date
  • Organisation – securely share to an organisation on the global Digitary network
  • Public on the web Securely – create a unique URL to your document and add a PIN; anyone in possession of the URL and the PIN will be able to view your document
  • Public on the web – create a unique URL to your document; anyone in possession of the URL will be able to view your document

Email Share

  1. This is the email address of the person you wish to share your document(s) with.
  2. Add a personal message to your email. The system will email the document URL together with your personal message to the share recipient.
  3. For increased security, you can optionally require the recipient to enter a PIN, together with their email, when accessing your document. You can choose your PIN or have one autogenerated for you, either way, your recipient will receive a separate email with the PIN.
  4. By default, shares do not expire. You can set an expiry date by clicking on this field
  5. By default, allow your recipient to download your document.
  6. Click to send the email notification and the email containing the PIN (if a PIN has been set) to your designated share recipient.

Organisation Share

  1. In the Recipient field, start typing the name of the institution that you would like to share your document with; you’ll get a drop-down menu from which you can choose your institution.
  2. You can also choose to include an expiry date for your share.
  3. Click Share and from here you will see notification that your share has been sent.

The organisation to which you have sent the share will then see the share in their designated inbox on the Parchment Digitary Services portal.

Note: If you do not see the Institution you would like to send your document to on the dropdown list, they may not be registered yet on the Parchment network, check with the institution.

Public on the Web Securely

  1. For this type of share, you must create a PIN of between 4-6 digits which you will need to communicate to your recipient separately.
  2. Optionally, you can also add an expiry date.
  3. By default, allow your recipient to download your document.
  4. Click Share.
  5. You can copy the unique URL and send in an email to whomever you choose. The recipient requires both the URL and the PIN to view your document.

Public on the Web

  1. Optionally include an expiry date, beyond which, your document share will no longer be available.
  2. By default, allow your recipient to download your document.
  3. Click Share.
  4. Copy the unique URL to your clipboard where you can then paste into a private email or to your CV or LinkedIn profile page if you wish. Anyone in possession of the URL will be able to view your document.